A poorly installed hot water geyserdoesn't just mean inconsistent hot water — it can lead to safety hazards,higher electricity bills, and costly repairs within the first year. Whetheryou're installing an electric geyser or a solar-backed hot water system,getting the installation right from the start matters far more than mosthomeowners realize.
This hot water geyser installationguide walks through the correct installation process step by step, the mostcommon mistakes homeowners and inexperienced installers make, and answers thequestions people search most before installing a new geyser.
A hot water geyser involves pressurizedwater, electrical wiring, and — in many homes — rooftop mounting and plumbingconnections. When any of these elements are installed incorrectly, theconsequences range from minor inefficiency to serious safety risks, includingelectrical faults, water damage, or pressure-related failures.
Beyond safety, correct installation alsodirectly affects performance and running costs. A geyser installed withoutproper insulation, incorrect tank positioning, or mismatched capacity will heatwater less efficiently — meaning higher electricity usage for the same amountof hot water.
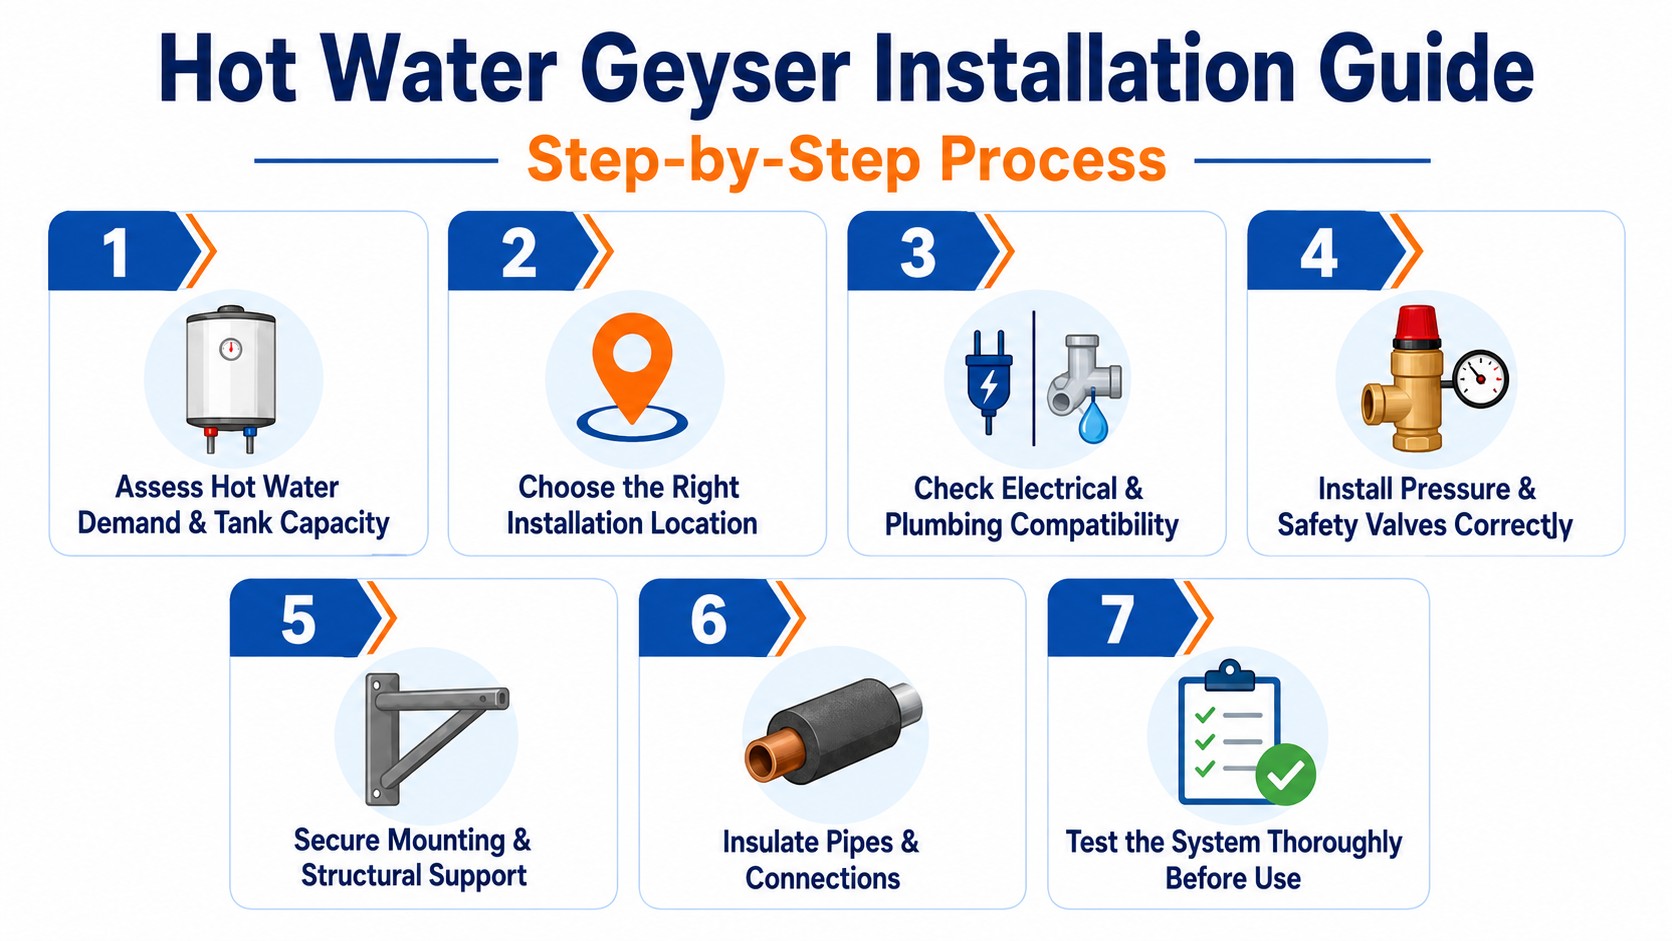
Before installation begins, household hotwater usage should be calculated based on the number of occupants, bathrooms,and peak usage times. Installing a tank that's too small leads to running outof hot water; too large wastes energy heating unused capacity.
The geyser should be installed close tothe points of use to minimize heat loss through long pipe runs, while alsobeing securely mounted on a wall or roof structure capable of supporting itsweight when full of water.
Before mounting, electrical wiring shouldbe inspected to confirm it can safely handle the geyser's power rating, andexisting plumbing should be checked for compatible pipe sizing and waterpressure.
Pressure relief valves, temperaturecontrols, and overflow protection must be installed and positioned correctly.These components exist specifically to prevent tank pressure building beyond safelimits.
The geyser — and for solar systems, therooftop collectors — must be mounted using approved brackets and structuralsupports, with attention to wall or roof strength, sealing, and weatherproofingto prevent leaks or structural damage over time.
Heat-resistant insulation should beapplied to hot water pipes to minimize heat loss between the tank and the pointof use, directly improving energy efficiency.
Before handing the system over,temperature accuracy, pressure levels, safety valve function, and leak pointsshould all be tested under real operating conditions — not just visuallyinspected.
Following this process is exactly whyprofessional installation matters. A correctly completed hot water geyser installation guide processfrom a certified provider accounts for every one of these steps, rather thanskipping ahead to "get it working."
Many homeowners select a geyser based onprice rather than actual household hot water demand. An undersized tank leadsto constant reheating cycles (raising electricity costs), while an oversizedtank wastes energy maintaining unused hot water.
Connecting a geyser to wiring that wasn'tassessed for its power load is one of the most dangerous shortcuts taken duringinstallation. This can lead to overheating, tripped circuits, or in worsecases, electrical fires.
A geyser tank becomes significantlyheavier once filled with water. Mounting it on weak brackets, unsuitable walls,or poorly reinforced roofing increases the risk of the unit detaching orcausing structural damage over time.
Skipping or incorrectly installingpressure relief valves removes a critical safety mechanism. Without it,pressure buildup inside the tank can lead to leaks, valve failure, or in rarecases, dangerous tank ruptures.
Leaving hot water pipes uninsulated —especially over longer runs — causes significant heat loss between the tank andthe tap, forcing the system to work harder and use more electricity to maintaintemperature.
For solar hot water systems, positioningcollectors without considering sun exposure and roof angle drastically reducesheating efficiency, undermining much of the energy-saving benefit of switchingto solar in the first place.
Installations that skip thorough testing— checking actual water temperature, pressure behavior, and leak points underreal conditions — often surface problems only after the homeowner has alreadystarted using the system daily.
Geyser installation involves electricalwork, plumbing, and pressure systems simultaneously. Attempting DIYinstallation without the right training increases the risk of all the mistakesabove happening at once, often without the homeowner realizing until somethingfails.
If you're unsure whether your existinginstallation was done correctly, these warning signs are worth checking for:
● Inconsistent or fluctuating watertemperature
● Unusual noises during heatingcycles
● Visible leaks around valves,pipes, or tank connections
● Frequent circuit trips when thegeyser is in use
● Higher-than-expected electricitybills relative to usage
● Slow heating or reduced hot watercapacity over time
If any of these apply, it's worth havingthe installation professionally inspected rather than waiting for a moreserious failure.
1. What is included in a proper hotwater geyser installation guide? A complete hot watergeyser installation guide covers capacity assessment, location selection,electrical and plumbing compatibility checks, safety valve installation, securemounting, pipe insulation, and full system testing before use.
2. How long does hot water geyserinstallation typically take? Most installations arecompleted within a single day, though timing can vary based on system type(electric vs. solar), roof or wall structure, and existing plumbing andelectrical conditions.
3. Can I install a hot water geysermyself? It's strongly discouraged. Geyser installationinvolves electrical wiring, pressurized plumbing, and structural mountingsimultaneously — mistakes in any of these areas can create safety risks or voidmanufacturer warranties.
4. What size geyser tank do I need formy home? Tank size depends on the number of occupants,bathrooms, and typical hot water usage patterns. A professional assessment isthe most reliable way to determine the right capacity for your household.
5. Why is my newly installed geysernot heating water properly? This is often caused byincorrect thermostat calibration, electrical wiring issues, or — for solarsystems — poor collector positioning. A post-installation inspection canidentify the exact cause.
6. Is solar hot water systeminstallation different from electric geyser installation? Yes. Solar systems require additional steps, including collectorplacement based on sun exposure and roof angle, plus integration with a backupheating element, alongside the standard tank and plumbing installation process.
7. What safety features should everygeyser installation include? Every installation shouldinclude a pressure relief valve, temperature control, and overflow protectionat minimum, correctly positioned and tested to prevent pressure-relatedfailures.
8. How do I know if my geyser wasinstalled correctly? Watch for warning signs likeinconsistent heating, unusual noises, leaks, frequent circuit trips, orunexpectedly high electricity bills — all of which can indicate installationissues worth having inspected.
A hot water geyser installation guide isonly useful if every step is followed correctly — and as the mistakes aboveshow, even small shortcuts during installation can lead to safety risks, higherelectricity costs, or premature system failure. Whether you're installing anelectric geyser or a solar hot water system, professional installationfollowing proper standards is what protects both your safety and your long-terminvestment.
Since 1942, St.Anthony's Service has installed, repaired, and maintained hot watersystems for homes and businesses across Sri Lanka, with certified techniciansfollowing strict safety and quality standards on every job.
Planning a new installation or want yourexisting system inspected? Getin touch with our team for a professional assessment.